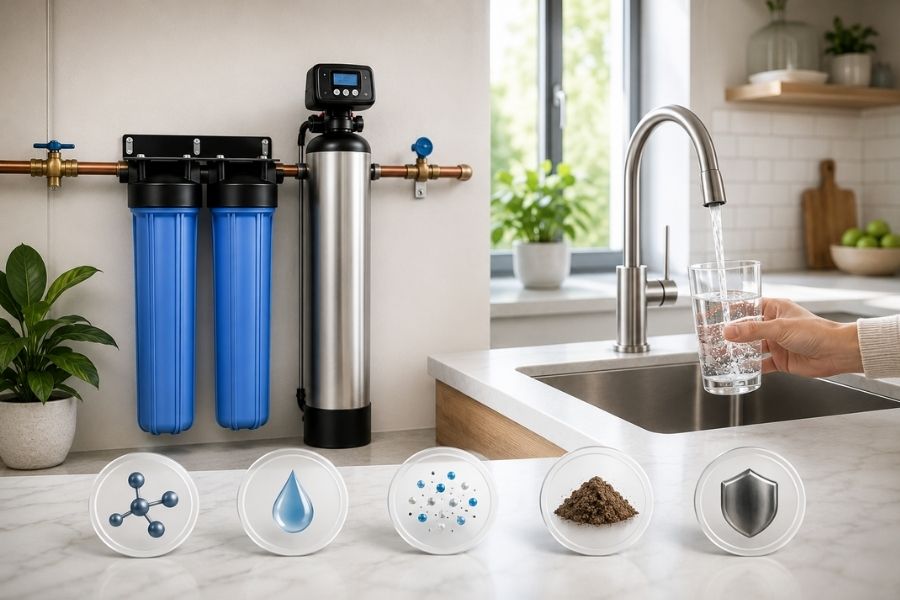
A whole-house water filter can feel l
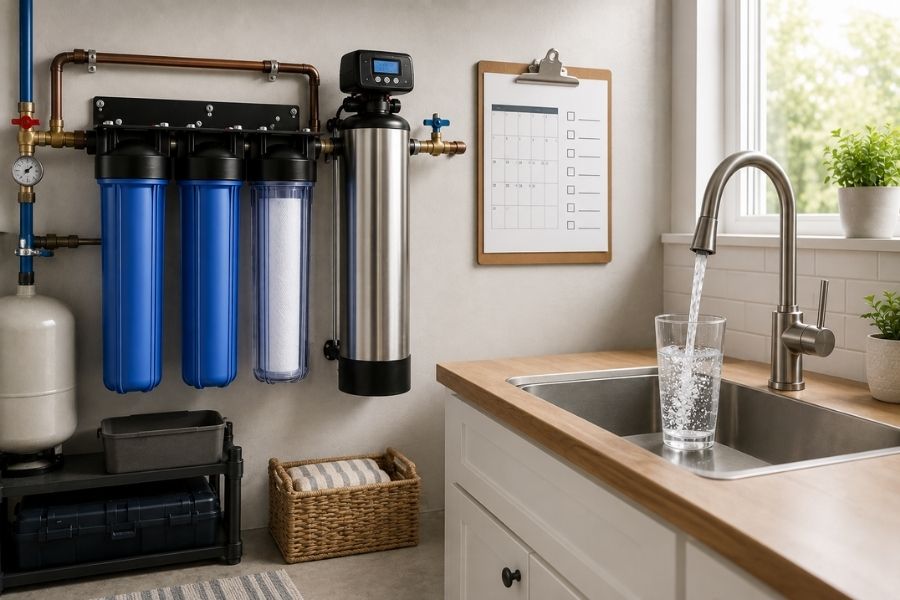
Whole-house water filter maintenance schedule showing 3 month 6 month and 12 month filter care checklist.
ike one of the most reassuring upgrades in a healthy home.
You install it where water enters the house, and the idea is simple: cleaner water from every tap, better showers, less chlorine smell, fewer visible particles, and more confidence in what your family is using every day.
But a whole-house water filter is not a one-time decision.
It is a system.
And like any system, it only works as well as it is maintained.
A filter that is overdue, clogged, poorly flushed, leaking, or filled with exhausted media can stop doing the job you bought it for. In some cases, neglected filters can reduce flow, allow contaminants through, create pressure problems, or become less hygienic inside housings, cartridges, reservoirs, and lines.
This is why maintenance is not the boring part of water filtration.
It is the part that keeps the system honest.
Quick Answer
A whole-house water filter should be checked monthly, inspected more carefully every 3 months, serviced more actively every 6 months, and fully reviewed every 12 months.
The exact replacement schedule depends on your water quality, household size, system type, flow rate, filter capacity, manufacturer instructions, and whether you use city water or private well water.
As a general rule:
Every month, do a quick visual check for leaks, pressure changes, unusual taste, odor, cloudiness, staining, or dampness around the system.
Every 3 months, inspect sediment filters, housings, pressure gauges, water flow, chlorine smell, taste changes, and filter dates.
Every 6 months, replace due cartridges, inspect O-rings and seals, clean housings if instructed, check carbon performance, review any paired softener or scale-control system, and confirm the setup still matches your water concerns.
Every 12 months, do a full system audit. Review water testing, filter media lifespan, UV or RO systems if present, replacement cartridge quality, manufacturer instructions, and whether the system still matches your real water risks.
The most important rule is simple: follow the manufacturer’s maintenance schedule, but act sooner if water pressure, taste, odor, sediment, leaks, or test results change.
At a Glance: Whole-House Water Filter Maintenance Schedule
| Timing | What to do | Why it matters |
| Monthly | Quick check for leaks, pressure changes, unusual taste, odor, cloudiness, staining, or dampness | Catches early warning signs before they become expensive |
| Every 3 months | Inspect sediment filters, housings, pressure gauges, water flow, filter dates, and chlorine smell | Helps prevent clogs, pressure drops, and reduced performance |
| Every 6 months | Replace due cartridges, inspect O-rings, clean housings if instructed, check carbon performance, and review paired systems | Keeps filtration active and avoids running water through exhausted media |
| Every 12 months | Full system audit, water test review, media lifespan check, UV, RO, or softener review if relevant | Confirms the system still matches your home’s real water needs |
| Any time water changes | Investigate sudden odor, taste, pressure drop, staining, cloudiness, sediment, or leaks | Water changes can signal filter exhaustion, plumbing issues, or source-water changes |
Also in This Article
- Why whole-house filter maintenance matters
- What to check every month
- What to do every 3 months
- What to do every 6 months
- What to review every 12 months
- When the filter becomes the source
- Biofilm and stagnant water risks
- Maintenance by filter type
- Common mistakes to avoid
- A simple maintenance log you can copy
Why Whole-House Filter Maintenance Matters
A whole-house filter treats water before it spreads through your home.
That means it may affect:
- Drinking water
- Shower water
- Laundry water
- Dishwashing water
- Appliances
- Bathrooms
- Kitchen taps
- Ice makers and refrigerators, depending on plumbing
Because a whole-house filter handles so much water, maintenance matters more than many people realize.
A clogged filter can reduce flow.
Spent carbon can stop reducing chlorine effectively.
Old cartridges can lose performance.
Improper replacement cartridges may not match the original system.
Leaks can damage floors, walls, cabinets, or utility rooms.
Neglected housings can become dirty inside.
The real question is not only:
What does this filter remove?
The better question is:
What does this filter still remove after 3, 6, and 12 months of real family use?
That is why maintenance should be part of the buying decision from the beginning.
To find the top-rated option for removing PFAS, chlorine, and microplastics from all your water, see Best Whole House Water Filter System.
The Monthly Quick Check
A monthly check should be simple. You are not servicing the whole system. You are watching for early signs that something has changed.
Once a month, look for:
- Leaks
- Drips
- Dampness near the system
- Pressure changes
- New chlorine smell
- Metallic taste
- Cloudy water
- Sediment or particles
- Staining in sinks or toilets
- Unusual noise from the system
This only takes a few minutes, but it can prevent bigger problems.
A slow leak near a filter housing may seem harmless at first, but over time it can create water damage, mold risk, cabinet swelling, rust, or expensive repairs.
A sudden pressure drop can also be an early sign that a sediment filter is clogging or that water flow is restricted somewhere in the system.
Before buying, understand the investment with Whole House Water Filter Installation Cost.
The 3-Month Maintenance Check
Every 3 months, your goal is to catch early performance changes.
This is the checkpoint that helps you avoid finding out too late that the filter is clogged, leaking, or no longer performing well.
1. Check Water Pressure
A sudden drop in water pressure can mean:
- Sediment filter clogging
- Carbon media restriction
- Blocked cartridge
- Scale buildup
- Valve issue
- Plumbing issue
If your water pressure drops after installing a whole-house filter, the system may be undersized, overdue for maintenance, or dealing with heavier sediment than expected.
If pressure drops slowly over time, the sediment filter is often the first place to check.
2. Check for Leaks
Look around:
- Filter housings
- Shutoff valves
- Bypass valves
- Pressure gauges
- Fittings
- Drain lines
- Floor under the system
- Wall or utility area behind the system
Even a small leak matters.
A slow drip can become mold, floor damage, cabinet swelling, rust, or an emergency repair.
Not sure which filtration type fits your home? Compare Whole-House Filter vs Under-Sink vs Pitcher.
3. Inspect the Sediment Filter
The sediment filter is often the hardest-working part of a whole-house setup.
It catches visible particles, rust, grit, sand, dirt, and debris before water reaches more expensive media.
If the sediment filter looks heavily discolored, clogged, slimy, or packed with particles, it may need replacement sooner than the standard schedule.
This does not always mean something is wrong with the filter. It may mean the filter is doing its job.
But it also tells you something important about your incoming water.
4. Notice Chlorine Smell or Taste
If your system uses carbon or catalytic carbon, pay attention to chlorine smell and taste.
Signs that carbon may be losing performance include:
- Pool-like smell returning
- Tea or coffee tasting more chemical
- Shower water smelling stronger
- Laundry smelling different
- Skin feeling drier after showers
This is not a lab test, but it is a useful real-life signal.
If chlorine smell returns quickly after installation, the carbon system may be undersized, exhausted, or not designed for your disinfectant type.
For a deep dive on contaminants, read PFAS, Chlorine, and Microplastics Whole-House Filter Guide.
5. Check Date Labels
Every filter change should be dated.
This can be as simple as writing the replacement date on the filter housing label, in a maintenance notebook, or in a spreadsheet.
A filter without a date becomes guesswork.
And guesswork is how families accidentally run water through exhausted cartridges for months.
6. Review Household Water Use
Maintenance schedules are not only based on calendar time.
They are also based on water volume.
A family of five uses more water than one person in a small apartment. A home with multiple showers, laundry loads, guests, and heavy cooking may exhaust filters faster.
Every 3 months, ask:
Has our water use changed?
Did we have guests?
Are we using more showers, laundry, or cooking water?
Did local water quality change?
Is there more sediment than usual?
Water use affects filter life.
To filter only your drinking water, check Best Under-Sink Water Filter.
The 6-Month Maintenance Check
The 6-month point is where you move from visual inspection to more active maintenance.
This is the time to replace filters that are due, check the system more carefully, and make sure you are not relying on old media.
1. Replace Due Cartridges
Some whole-house cartridges are replaced every few months. Others last longer. Some tank-style media systems may last years.
The right schedule depends on your system.
Do not replace based on internet averages alone.
Use:
- Manufacturer schedule
- Water usage
- Pressure change
- Water test results
- Taste and odor changes
- Cartridge rating
- Local water conditions
A replacement cartridge should match the system’s specifications. A cartridge may fit physically but still not match the performance of the original filter.
If lead is a risk in your pipes, find Best Water Filter for Lead Removal.
2. Clean Housings If the Manufacturer Allows It
Some filter housings can be cleaned during cartridge changes.
Others should only be handled in a specific way.
Always follow the manual.
When cleaning is appropriate, look for:
- Sediment buildup
- Slime or biofilm
- Cracks
- Damaged O-rings
- Cloudy plastic
- Mineral buildup
- Deformed threads
- Rust on nearby parts
If a housing is cracked, cloudy, brittle, or hard to seal, do not ignore it.
The housing is part of the water-contact system.
For complete purification across your whole home, explore Best Whole House Reverse Osmosis Systems.
3. Check O-Rings and Seals
A small O-ring can cause a big leak.
Every 6 months, check whether seals look:
- Dry
- Cracked
- Flattened
- Twisted
- Loose
- Dirty
- Hard to reseat
Use only the lubricant recommended by the manufacturer. Not every grease or oil is safe for drinking-water contact.
This is a small detail, but it matters.
Wondering if whole-house RO is necessary? Read Do You Really Need Whole-House RO?
4. Check Carbon Performance
Carbon does not last forever.
Once carbon is exhausted, it may stop reducing chlorine, taste, odor, or certain chemicals effectively.
Signs carbon may be due include:
- Chlorine smell returning
- Bad taste returning
- Water odor changing
- Manufacturer gallon capacity reached
- Filter age exceeded
- Local water disinfectant level increased
For chloramine, make sure the system is actually designed for chloramine reduction. Standard carbon may not be enough.
5. Check the Bypass Valve
Your bypass valve lets water bypass the filter system during service or emergencies.
Every 6 months, make sure you know:
- Where it is
- How it works
- Whether it moves properly
- Whether everyone in the home knows not to change it accidentally
This is boring until something leaks.
Then it matters immediately.
For maximum protection against multiple contaminants, learn about Layered Water Filtration.
6. Review Any Paired Systems
Whole-house filtration is often paired with other water systems.
You may also have:
- Water softener
- Salt-free conditioner
- UV system
- Reverse osmosis system
- Under-sink filter
- Iron filter
- Acid neutralizer
- Well water treatment
Every 6 months, review the full chain.
A whole-house filter is only one layer. If another layer is neglected, the system may not perform as expected.
Before choosing any filter, always How to Test Your Water Quality first.
The 12-Month Maintenance Check
The 12-month mark is your full water system audit.
This is when you step back and ask:
Is this still the right system for our home?
1. Test or Review Your Water
For city water, review your local water quality report and consider testing at the tap if you have old plumbing, lead concerns, taste changes, odor changes, or specific health concerns.
For private well water, annual testing is especially important because the homeowner is responsible for monitoring water quality.
Well water can change over time due to weather, agriculture, construction, flooding, plumbing changes, or local environmental conditions.
Taste alone is not safety.
2. Compare the System to Your Actual Water Risk
Ask:
- Are we treating chlorine when our real issue is lead?
- Are we softening water but not filtering contaminants?
- Are we using a pitcher when we need under-sink protection?
- Are we relying on whole-house filtration for contaminants introduced by old plumbing?
- Are we maintaining PFAS claims correctly?
- Are we changing filters based on time, gallons, or guesswork?
This is where many families realize they need a layered setup.
Whole-house filtration helps the home.
Under-sink filtration often protects drinking and cooking water more directly.
Curious about portable options? See Berkey Water Filter Review.
3. Review Replacement Media
Some tank-style whole-house filters use media that lasts longer than cartridge filters.
But longer does not mean forever.
At the 12-month check, review:
- Manufacturer lifespan
- Gallon rating
- Water usage
- Test results
- Pressure changes
- Taste and odor changes
- Service history
- Warranty requirements
If the system has a large carbon tank, catalytic carbon, KDF media, ion exchange resin, or specialty PFAS media, make sure you know when that media is due.
4. Check UV System If You Have One
UV systems are often used for bacteria concerns, especially with private wells.
But UV only works properly if the system is maintained.
A UV setup may require:
- Lamp replacement
- Quartz sleeve cleaning
- Power supply check
- Flow rate check
- Pre-filtration check
- Water clarity check
If water is cloudy or full of sediment, UV performance may suffer because microorganisms can be shielded from the light.
If bacteria are a concern, this is not an area to guess.
5. Review Your Under-Sink Drinking Water Filter
If you use a whole-house system plus under-sink filtration, the under-sink system needs its own schedule.
Check:
- Pre-filter
- Carbon filter
- RO membrane if present
- Post-filter
- Storage tank
- Faucet
- Leak detector
- Drain line
- TDS trend if using RO
- Manufacturer replacement schedule
Do not assume the whole-house system means the under-sink filter can be ignored.
They are doing different jobs.
6. Inspect Materials and Water-Contact Parts
At least once a year, look beyond filter performance.
Look at what the water touches.
Check for:
- Cloudy plastic housings
- Cracked parts
- Old tubing
- Corroded fittings
- Cheap plastic reservoirs
- Rubber parts that look degraded
- Leaking faucets
- Stained tanks
- Moldy or damp cabinets
- Old pitcher reservoirs
This is the Zero Toxic Load side of maintenance.
The goal is not only to remove contaminants. The goal is also to avoid adding new problems through poor materials, stagnant water, or neglected parts.
When the Filter Becomes the Source
A water filter should reduce unwanted contaminants, not become a new source of concern.
Over time, filter housings, plastic reservoirs, tubing, seals, O-rings, tanks, and fittings can age. Heat, sunlight, pressure changes, poor installation, mineral buildup, and long-term wear can all affect water-contact materials.
This does not mean every plastic component is automatically unsafe. Many certified systems use plastic parts safely.
But in a low-toxin home, old or damaged water-contact materials should not be ignored.
Look for signs such as:
- Cloudy plastic
- Cracks
- Brittleness
- Deformed threads
- Discoloration
- Persistent odor
- Sticky or degraded seals
- Tubing that looks stiff, yellowed, or worn
- Reservoirs that are scratched or hard to clean
- Housings that have been exposed to heat or direct sunlight
If a part looks aged, damaged, cloudy, cracked, or questionable, inspect it carefully and follow the manufacturer’s replacement guidance.
This is especially important for systems where filtered water sits in a reservoir or passes through older plastic parts after filtration.
A filter that removes contaminants but stores water in worn, low-quality, or degraded materials does not fully match the Zero Toxic Load goal.
Biofilm and Stagnant Water: The Hygiene Issue Most People Miss
A water filter is a wet, enclosed system.
That is exactly why maintenance matters.
If cartridges, housings, reservoirs, tubing, or low-flow sections are neglected, stagnant water and organic buildup can create conditions where biofilm may develop.
Biofilm is not just dirt. It is a thin layer of microorganisms and organic material that can form on wet surfaces over time.
This is why filter maintenance should include more than just changing cartridges.
You also need to think about:
- Flushing new filters properly
- Replacing cartridges on time
- Cleaning housings if instructed
- Avoiding long periods of stagnant water
- Keeping reservoirs clean
- Replacing old or damaged parts
- Following sanitizing instructions where relevant
- Checking systems after travel or long periods of low use
This is especially relevant for pitcher filters, countertop reservoirs, RO storage tanks, rarely used taps, and systems in warm utility areas.
The goal is not to become afraid of your filter.
The goal is to remember that filtered water systems are living home systems. They need basic care to stay clean and effective.
Maintenance by Filter Type
Different systems need different care.
Here is how to think about the main types.
Sediment Filters
Sediment filters catch visible particles, grit, rust, sand, and debris.
Maintenance signs:
- Pressure drop
- Dirty filter appearance
- Cloudy water
- Sediment in fixtures
- Reduced flow
- Shorter filter life than expected
Weakness: Sediment filters do not remove most dissolved contaminants, PFAS, lead, chlorine, chloramine, VOCs, or bacteria by themselves.
Who should think twice: Anyone who assumes a sediment filter alone is a complete water safety solution.
Sediment filters are often changed more frequently than other parts of the system, especially in homes with well water, old pipes, construction nearby, or visible particles.
Carbon Filters
Carbon filters are used for chlorine, taste, odor, and some chemical reduction depending on the system.
Maintenance signs:
- Chlorine smell returns
- Taste changes
- Odor returns
- Manufacturer capacity reached
- Reduced flow
- Old cartridge date
Weakness: Standard carbon may not be enough for chloramine, PFAS, lead, bacteria, nitrates, or microplastics unless the system is specifically designed and tested for those claims.
Who should think twice: Anyone with specific health-related concerns who has not checked the performance data sheet or certification claims.
Carbon is not magic. Once it is exhausted, it cannot keep doing the same job.
Catalytic Carbon Filters
Catalytic carbon is often used when chloramine is present.
Maintenance signs:
- Chloramine smell remains
- Taste does not improve
- Filter capacity reached
- Water report confirms chloramine but system is not designed for it
- Performance claims are vague
Weakness: Catalytic carbon still has capacity limits and needs correct sizing, contact time, and maintenance.
Who should think twice: Homes that use high water volume but choose an undersized system without checking flow rate and contact time.
If your city uses chloramine, do not assume a basic chlorine filter is enough.
Water Softeners
A water softener is not a contaminant filter.
It helps with hardness minerals that cause scale, appliance stress, soap issues, and dry-feeling water.
Maintenance may include:
- Salt level check
- Brine tank inspection
- Resin performance review
- Regeneration settings
- Leak check
- Salt bridge check
- Annual service if needed
Weakness: A softener does not automatically remove PFAS, lead, chlorine, bacteria, VOCs, microplastics, or pesticides.
Who should think twice: Anyone buying a softener because they believe hard water and contaminated water are the same problem.
A softener can be useful, but it does not replace filtration.
Reverse Osmosis Systems
Reverse osmosis is usually a point-of-use drinking-water system.
It may be used alongside a whole-house system.
Maintenance may include:
- Pre-filter replacement
- Carbon filter replacement
- RO membrane review
- Post-filter replacement
- Tank check
- Faucet check
- Drain line check
- Leak inspection
- Sanitizing according to instructions
Weakness: RO can reduce beneficial minerals, create wastewater, take up under-sink space, require regular maintenance, and may need remineralization depending on taste and preference.
Who should think twice: Homes with very limited under-sink space, strict water-saving concerns, no maintenance plan, or no interest in replacing filters on schedule.
RO is strongest when maintained properly.
Do not ignore it just because the water still tastes clean.
UV Systems
UV systems are used for microbial risk, often in well water setups.
Maintenance may include:
- UV lamp replacement
- Quartz sleeve cleaning
- Power supply check
- Flow rate check
- Sediment pre-filter check
- Water clarity check
- Lab testing if bacteria were a concern
Weakness: UV does not remove sediment, PFAS, lead, chlorine, nitrates, arsenic, microplastics, or chemicals. It targets microbial risk when properly designed and maintained.
Who should think twice: Anyone who thinks UV is a complete water filter instead of one layer in a water treatment system.
UV should never be treated as a decorative add-on.
If you need UV, maintenance is safety-related.
Pitchers and Countertop Filters
Even if this article is about whole-house filters, many families use a pitcher or countertop filter as part of a layered setup.
Maintenance matters here too.
Watch for:
- Old cartridges
- Slow flow
- Dirty reservoirs
- Cracked plastic
- Cloudy plastic
- Water sitting too long
- Filters not seated properly
- Countertop systems with old tubing
Weakness: Pitchers have limited capacity, rely heavily on regular cleaning, may leave water sitting in plastic, and may not reduce serious contaminants unless specifically certified.
Who should think twice: Families with lead, PFAS, well water, bacteria, or high-volume daily water needs who are relying on a pitcher as their only solution.
Pitchers can be useful, but they need cleaning and timely filter changes.
Warning Signs Your Filter Needs Attention Sooner
Do not wait for the calendar if the water changes.
Check the system immediately if you notice:
- Sudden pressure drop
- Chlorine smell returning
- Metallic taste
- Rotten egg smell
- Cloudy water
- Brown or yellow staining
- Black particles
- Grit in water
- Slimy filter housing
- Leaks
- Moldy smell near the system
- Skin irritation after showers
- Unusual appliance scaling
- Filter change date overdue
- Water test results change
A maintenance schedule is a guide.
Your water is the signal.
The Zero Toxic Load Maintenance Check
Healthy water filtration is not only about replacing cartridges.
It is also about reducing unnecessary material exposure.
At each major maintenance check, ask:
- Is water sitting in old plastic?
- Are any housings cracked or cloudy?
- Are tubes or fittings degraded?
- Is the faucet lead-free?
- Are replacement filters genuine and certified?
- Is water standing too long in a reservoir?
- Is the system clean inside?
- Are we using the correct cartridge?
- Are we flushing new filters properly?
- Are we storing replacement filters cleanly?
A low-toxin water setup should not become a neglected plastic-and-stagnant-water setup.
Maintenance is part of the lower-toxin lifestyle.
Common Maintenance Mistakes
Mistake 1: Waiting Until the Water Tastes Bad
Taste is a late signal.
A filter can lose performance before you notice taste changes.
Change filters based on the manufacturer schedule, gallon rating, and real water conditions, not only taste.
Mistake 2: Using Off-Brand Cartridges Without Checking Compatibility
A cartridge may fit physically and still not match the certified performance of the original system.
This matters because the system’s testing or certification may apply only when the correct replacement cartridge is used.
Mistake 3: Forgetting to Flush New Filters
Many filters need flushing before use.
Skipping this step can affect taste, carbon dust, performance, or first-use experience.
Always follow the installation and flushing instructions.
Mistake 4: Ignoring Pressure Drop
Pressure drop often means something is restricting flow.
That might be sediment, clogged cartridges, undersized filters, or system design issues.
Do not ignore it.
Mistake 5: Not Testing Well Water Annually
Well water can change.
If you use private well water, a yearly test should be part of the home maintenance rhythm.
This is especially important for bacteria, nitrates, pH, total dissolved solids, and any local contaminants relevant to your area.
Mistake 6: Treating a Softener Like a Filter
A softener helps hardness.
It does not automatically remove PFAS, lead, chlorine, bacteria, VOCs, or microplastics.
If your system has both a softener and filter, maintain both.
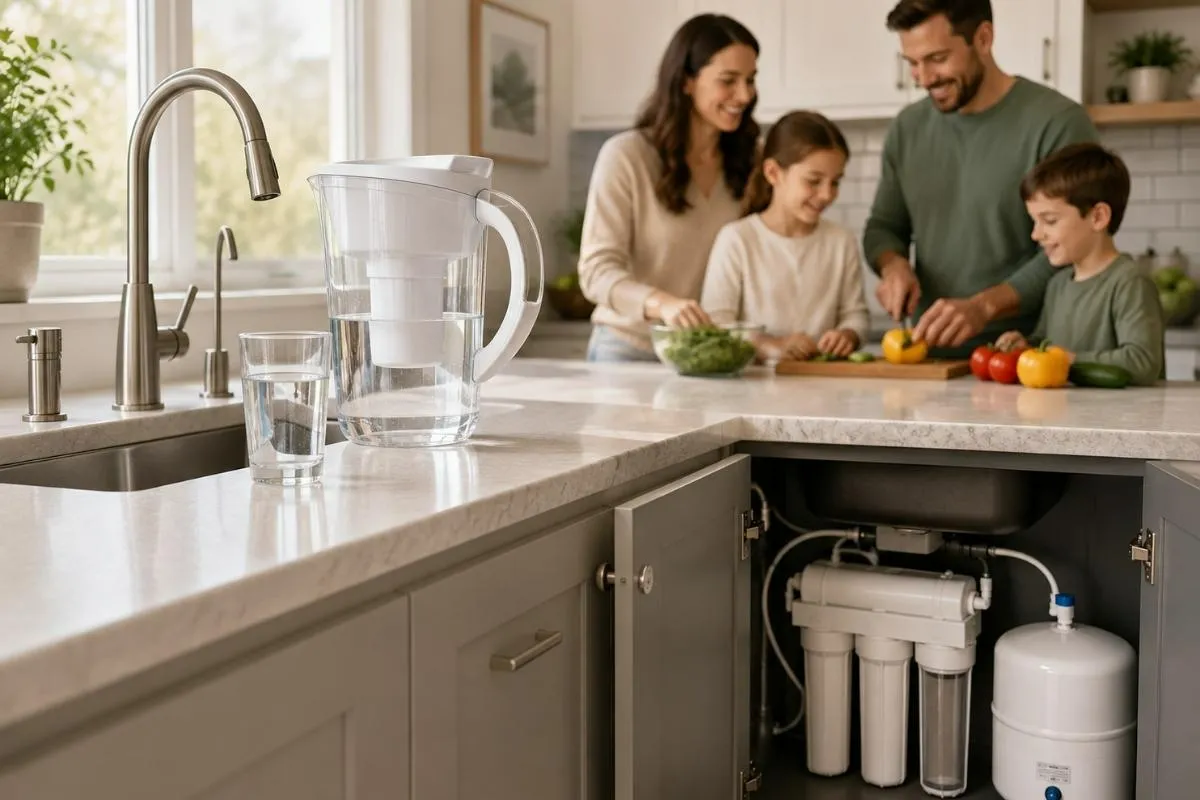
Mistake 7: Forgetting About the Kitchen Tap
A whole-house system may improve the whole home, but the kitchen tap still deserves special attention.
That is where drinking, cooking, coffee, tea, soups, smoothies, and pet water usually come from.
For many families, a layered setup is still best.
Simple Water Filter Maintenance Log
You can copy this into a note, spreadsheet, or printable checklist.
| Date | Task | System part | Filter or media changed? | Water pressure | Taste or odor notes | Leak check | Next due date |
| Monthly quick check | Housings, fittings, pressure, water quality | ||||||
| 3-month check | Sediment, carbon, housings | ||||||
| 6-month service | Cartridges, O-rings, softener, RO | ||||||
| 12-month audit | Water test, media review, full system |
This may feel simple, but it prevents one of the biggest problems in home filtration:
Nobody remembers when the filter was last changed.
My Practical Recommendation
If I were choosing a water filtration setup, I would not only compare contaminant reduction claims.
I would compare maintenance reality.
I would ask:
- Can this system actually be maintained properly?
- Are replacement filters easy to buy?
- Is the schedule clear?
- Is there a real performance data sheet?
- Are the water-contact materials acceptable?
- Does it protect the kitchen tap properly?
- Does it require professional service?
- What happens if a filter change is missed?
- Does it fit the actual water test?
- Is it realistic for the home and household using it?
The best filter is not the one with the longest marketing list.
It is the one that matches your water, your home, your habits, and your ability to maintain it correctly.
Final Verdict: What to Do Every 3, 6, and 12 Months
Every month, do a quick visual check.
Look for leaks, dampness, pressure changes, unusual taste, odor, cloudiness, staining, or sediment.
Every 3 months, check the basics more carefully.
Look at sediment buildup, pressure gauges, filter dates, housings, chlorine smell, taste changes, and water flow.
Every 6 months, do active maintenance.
Replace due cartridges, inspect housings and O-rings, check carbon performance, review paired systems, and make sure the system still fits your household water use.
Every 12 months, step back and audit the whole setup.
Review water test results, check well water if relevant, inspect all components, evaluate media lifespan, confirm replacement filters, and decide whether your system still matches your actual risk.
A whole-house water filter is only a healthy home upgrade if it is maintained.
Otherwise, it becomes a box on the wall that slowly stops doing what you trusted it to do.
Clean water is not just about buying the right system.
It is about keeping that system honest.
References:
EPA WaterSense® Guide to Selecting Water Treatment Systems
EPA Water Filter Education Handouts
NSF: Step-by-Step Considerations When Choosing a Water Purifier for Your Home
NSF Water and Wastewater Standards
CDC: Steps To Take – Private Well Water Safety
CDC Home Water Treatment Systems Guidance
EPA: Consumer Confidence Reports (CCR)